
In an attempt to design a more "beery" gluten-free beer, the Special Lady-Friend (SLF) and I turned to buckwheat. I first heard about brewing with buckwheat on a Sunday Session podcast on The Brewing Network (an excellent resource for all things brewing), and then followed the directions for malting the buckwheat found on Jon Plise's website. This post is meant to document my process, while providing a redacted step-by-step how-to. Be sure to check out Jon's site for more extensive (and aesthetically pleasing) instructions.
You can buy roasted buckwheat (kasha) to add flavor and color to a beer, but, because it has not been malted, it will not contribute a significant amount of fermentables. We're looking to avoid the "sorghummy" sweet-spice flavor--the idea is to replace a portion of the sorghum syrup with malted buckwheat. The malting process develops enzymes needed to convert the starches in the cereal grain to fermentable sugars. Although it is a "pseudo-cereal," buckwheat can be malted in a similar manner as barley, and, from what I could learn, has enough diastatic power to convert (which means it contains enough enzymatic potential to process its starches into sugars)
 |
| Ewww! Groats! |
Although I've heard mention of buying commercially malted buckwheat, I haven't been able to find it anywhere online. (If you have a source, please let me know!) We decided to malt our own. We went to the local food co-op and picked up a couple of pounds of buckwheat groats (about $2 a pound). In this first trial, we did a small batch to get the process down. I weighed the grain to mark the difference from groat to the malted buckwheat. You can see I went with 2 pounds to start.
 |
| Is that a bag of buckwheat, or are you just happy to see me? |
We put the raw buckwheat groats in a hop bag, thinking that this would be the easiest way to separate them later, after soaking. I like to think it did, and will do this next time, although we'll need a bigger bag.
 |
| Soak it, groats! |
We covered the hop bag full of groats with about 4 inches of water in a clean bucket and let it soak for about 36 hours. After a couple hours, the water had a pinkish hue and was really slimy. Every 6-8 hours (every time we were making a meal) we would dump the water, rinse the bag with the sprayer on my sink, and refill the bucket.

We put the soaked groats on a couple of cookie sheets to germinate. You will notice we used some of our fine dish linens to line the sheets. In hindsight this was unnecessary, and we lost a bit of the sproutlings because they stuck to the towels (read: don't do it!). We also covered the groats with dishtowels to limit the amount of dust and other nasties that may land on them. That worked well, and you should cover them with something. We sprayed the groats with water 2-3 times a day to keep them moist and sprouting. Whenever we sprayed them, we stirred them as well, to make sure they were watered evenly.
Here's a progression of EXTREME close-ups. Prepare (steel) yourself:
 |
| This is after about 36 hours on our ghetto sprouting tray. You can see little white acrospires starting to emerge from the groats. They sure are cute when they're young! |
 |
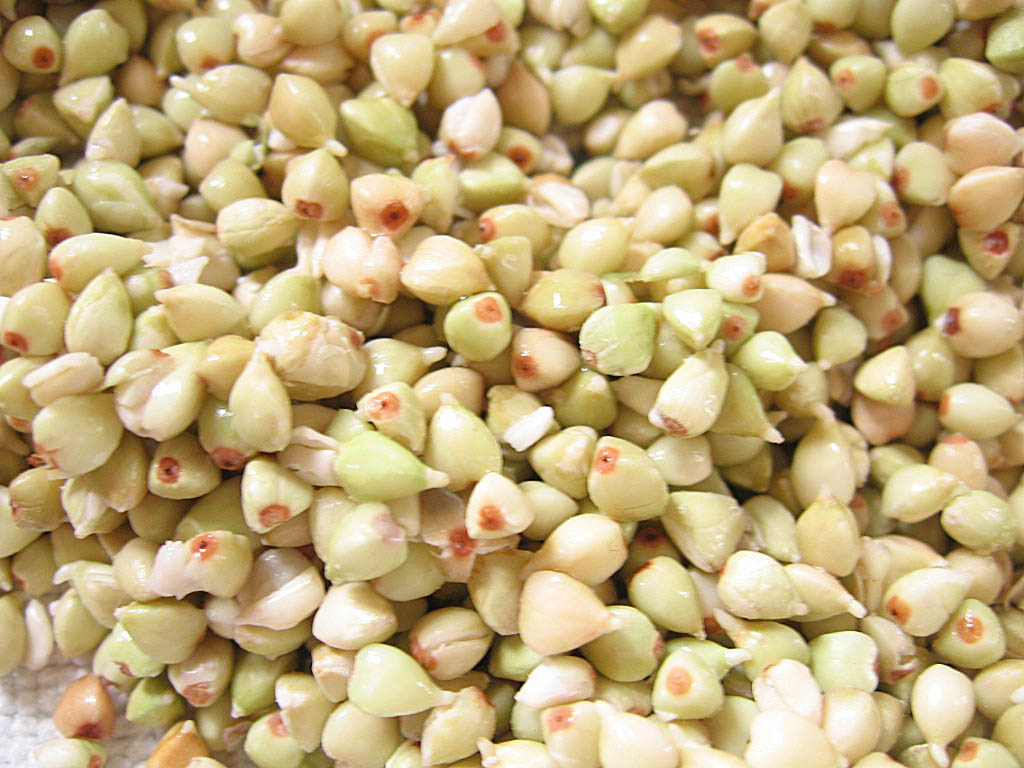
| This is about 4 days after we begun germinating the groats. I read somewhere you want the acrospire (the shoots) to be at least 2/3 the length of the groat (or kernel, seed). According to that stat, these are ready to be dried out. |
In order to preserve the malted buckwheat you need to remove all the moisture from the groats, otherwise they could mold up on you, adding nice musty overtone to your beer. To dehumidify these bad-boys, we took them off the towels and put the two cookie sheets in the oven on the "warm" setting. Stirring it every hour, we were looking for the acrospires to shrivel and brown a bit, so that they will be brittle, making them easy to remove. Also, the groats themselves will be easily powdered by chewing them (not steely, or hard, as they were before malting). We determined it takes about 3 hours to dry out 2 pounds. This, of course, will vary depending on the amount of layering of the malted groats in the pan, the moisture content of the groats after malting (ours were barely moist to the touch), the mass of groats that you are kilning, and your oven temperature.
 |
| They were still just sprouts and you threw them in your oven? You MONSTER! |
The final step in preparing the buckwheat for kilning is to remove the acrospire. There are as many approaches to doing this as there are in skinning cats, although (as we all know from our cat skinning days) some work better than others. I have read that using a pillowcase in a clothes dryer works well, but I have a brewery instead of laundry facilities, and I don't think that the laundromat's staff would approve. Besides, I don't know if I want to be putting any laundromat lint in my beer.
 |
| We offer the finest buckwheat hand massages, you can even keep your acrospires! |
Instead, I put my dried malted groats back into the hop bag and rolled it around on the counter in a "kneading-the-dough" motion for about 5 minutes or so. This seemed pretty effective, although it is rather hands-on and not as easy as tying them in a pillowcase and throwing them in a dryer...
To be honest, this made quite a mess (as do many methods of skinning cats), and I don't know if I'd want to do this with any more than 2 pounds of buckwheat. Next time I will probably just trade a couple beers to do a load of buckwheat in a buddy's dryer. Yes, there was an innuendo in there.
 |
| Buckwheat kief. |
So that's it for the malting of buckwheat. At the end of the process I threw the dried malted groats back on the scale -- they weighed 1 pound 12 ounces, so I lost about a quarter pound of weight in a 2 pound batch, or 12.5%. I'll use this as a guideline next time I malt up some groats.
The next step is to roast our malted buckwheat to different levels, with the thought of adding a range of tastes to our hopefully beery gluten free beer. With only one and three-quarter pounds to play around with, we will only be making 3 gallons of beer in this first experimental batch, and will definitely need to use some other ingredients. I'll cover both the kilning and the design and brewday in future posts. Cheers!
No comments:
Post a Comment